Measurement Calibration
The MiPACS Viewer will interpret the measurements on an image via the DPI (Dots Per Inch) of the image. Once calibrated using the below methods, all images taken with that capture device will be derivative of that measurement.
This does not account for magnification due to tube head proximity. For exact measurements (Endo, Root Canal) you will need to use the Measurement Calibration tool each time on your files so that measurements will be accurate.
Step 1
Acquire an image of an object with a known length. In our example we will be using a US Quarter (size 24.26mm).
Step 2
Select the Measurement Calibration tool from the “Image” drop down menu. Once active, left click and hold one side of the object and drag to the end of the length and release. You will be prompted to enter the measurement for this length in millimeters.

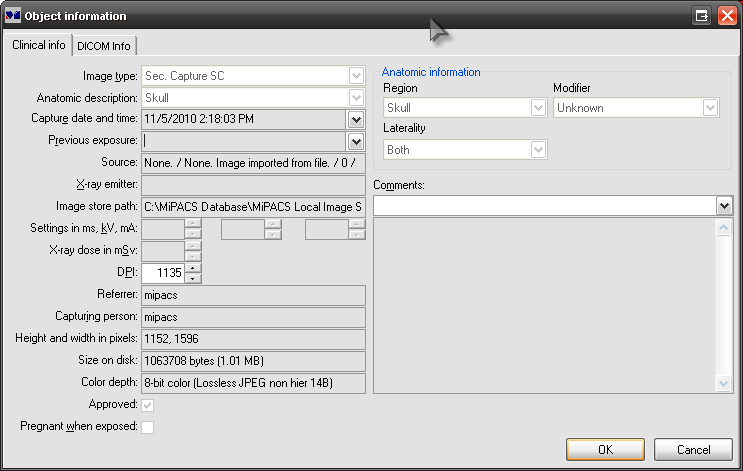
Step 3
Right click on the image and select “Show Image Information” to display the object information page. If you do not have “Show Image Information” listed on your context menu, then you most likely have “Show Annotations” turned on. Turn this off from the Image Analysis toolbar. Note what the DPI value for the image is. In this example the DPI value of our image is “1135.”
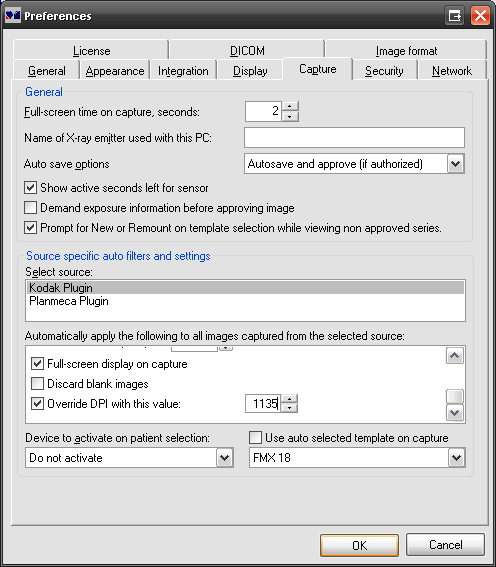
Step 4
Close the Object Information dialog box. From the drop down menus at the top, select System, then Preferences. On the Preferences dialog box, select the “Capture” tab. Select the source of your image, then in the menu below scroll down to the “Override DPI with this value” option and input the DPI of your image.
In our example we used the Kodak to capture the image and the “Override DPI with this value” is “1135”, the same value we recorded above.